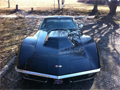
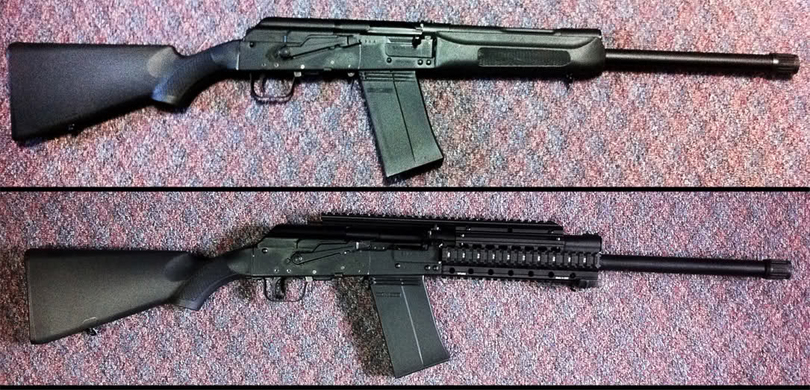
This is the Saiga-12:
That is how it is directly out of the box. Base cost is between $500 - $700 as of 4/03/12 when I actually purchased the weapon. I have no idea what the base cost is now. The one pictured above was purchased by yours truly for $650, out the door with tax included.
Included was a cleaning kit, and a 5 round Izhmash manufactured magazine capable of holding either 2 2/4 inch or 3 inch shells.
The Saiga-12 is a gauge combat shotgun is available in a wide range of configurations, visually patterned after the Kalashnikov series of assault rifles. Like the Kalashnikov rifle variants, it is a rotating bolt, gas-operated gun that feeds from a box magazine. All Saiga-12 configurations are recognizable as Kalashnikov-pattern guns by the large lever-safety on the right side of the receiver, the optic mounting rail on the left side of the receiver and the large top-mounted dust cover held in place by the rear of the recoil spring assembly. The looser clearances offered in an AK style design result in high reliability—an enormous boon on a semi-automatic shotgun, as this class of weapon had previously tended towards unreliability. The Saiga-12 is manufactured by the arms division of Izhmash, in Russia. It was previously imported into the US by European American Armories, although their agreement expired in 2005 and Izhmash is now exporting through the Russian-American Armory Company. Izhmash also manufactures Saiga 20's and Saiga 410's in 20-gauge and .410 bore, as well as the Saiga semi-automatic hunting rifles in a number of centerfire calibers.
While the Saiga-12, out of the box is a fairly awesome weapon and an excellent platform. I was not satisfied and I knew it could be so much more. So I set about researching for several days about what could be done to this weapon. This tread is about this specific build. Many have built other versions with conversion. I chose a different path.
I am aware that there is a forum dedicated specifically to this shotgun and the Saiga cult - however, after looking at it for the better part of 2 days, I've decided that it has been taken over by accessory manufacturers and that 90% of the comments are why this part sucks and the other part is better because Company A built it instead of Company B and company A is full of douches... It has also turned into a "who can customize their Saiga the most" without regards to performance or reliability. Also, those forums seem to be filled with kids that want to do this to their Saiga-12's simply because it looks good even though when you put your grey matter to it - that's plain stupid. Now, I have to admit - some of those designs would give me a woody if I saw it in a movie. But in reality and after shooting this thing and then seeing the buffer pad on those mods - I'm thinking it WOULD NOT be a good idea. Additionally, I can't see how it would be possible NOT to be creating a tremendous amount of wiggle room and trigger slop with a system like that. So, I'll not be getting much advice from those forums.
On those forums 99% of everyone is converting their Saiga-12 - and by converting, they are relocating the trigger group forward like it is on an AK-47 naturally. Take a good look at the photo I posted above - On a ''normal'' AK, the trigger group is MUCH closer to the magazine. On the Saiga-12 it isn't....and people, for some reason, want it moved forward. Now, I do not like the standard stock and foregrip that comes with this - new ones have already been ordered. However, after I took a long look at the schematic for the Saiga-12, I decided I didn't want to move the trigger group up. I decided against it for two main reasons. 1) I didn't want my face that close to the gas tube on a 12-gauge shotgun that I KNOW I will be shooting 3" magnum loads and probably a bit of ''specialty'' ammo in...that just doesn't seem like a good idea. 2) all of the conversion stocks that utilize the pistol grip and forward trigger grouping seemed that they would be harsh as hell on one's cheek. Additionally, I have spoken to a person I know who may or may not have trained with or been a Spetsnaz troop. He made the point of saying that if Russian troops knew what the Saiga looked like to get imported into the USA - they would probably opt to keep them that way...the new design just makes more sense from a practical, safety, and reliability stand point. Being who he is - I'll take his word for it.
So, after a significant amount of searching, I found THIS aftermarket stock replacement with pistol grip. That stock and grip replacement has some kind of new(ish) recoil reduction system built in. And after shooting 100 3" 00 Buck Magnum rounds, I decided that would be an excellent tactical stock to use. As you can see, even though it utilizes a pistol grip, there is no need to relocate the trigger group so no mechanical modifications are necessary for the gun, at this point.
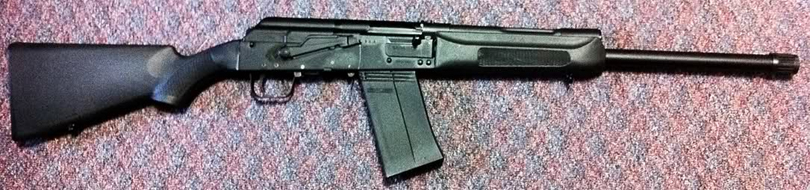
One of the first part-swap I decided to do was to replace the flimsy plastic foregrip with a set of UTG machined aircraft aluminum Quad Rails:

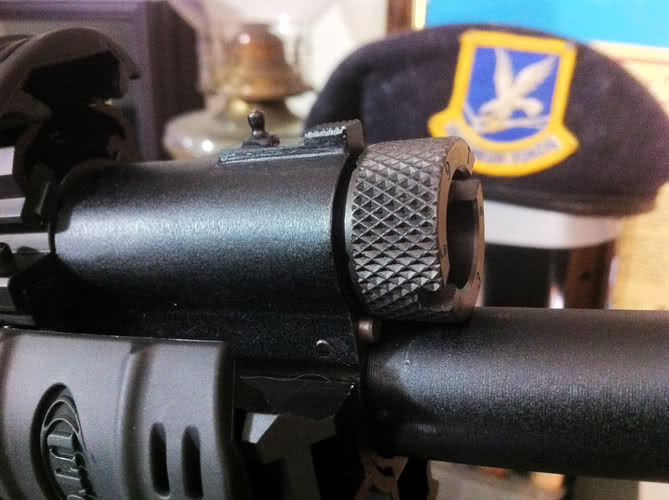
The interesting thing about these quad rails is that they are designed to allow the use of the stock iron sights without any modifications to the sights or the weapon. (See photo below for sight example)
Contained in the box, were the following:
1) The long top rail cover (Which I will opt to use)
2) The short top rail cover
3) The bottom cover
4) The middle cover
5) Rubber rail protectors, screws and allen wrenches.
The removal of the front grip is extremely easy. One single screw is all that holds it in place. This is the screw that also mounts the retainer for the front sling mount.
Once the screw is removed, gently tap the grip and pull towards the muzzle as there is a small plastic tang that extends into the receiver by about 1/8th inch.
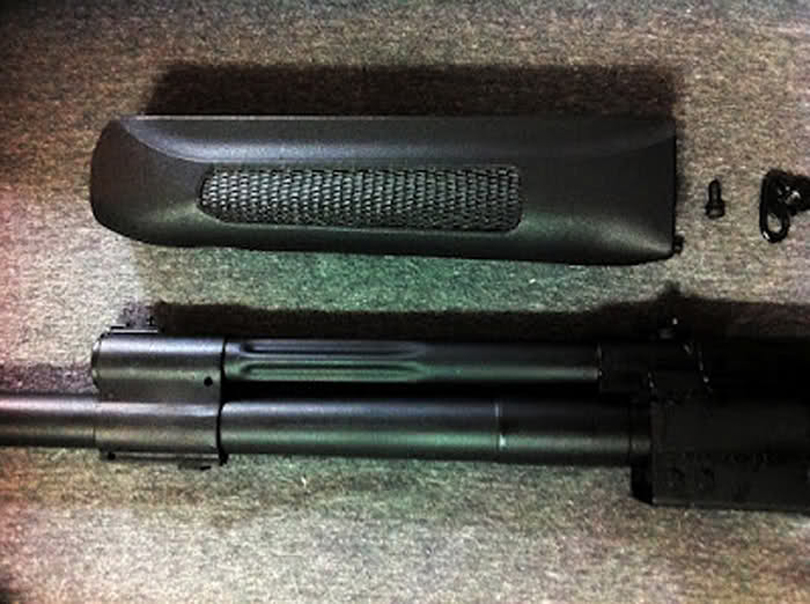
Here is the Saiga-12 with the installed UTG Quad Rails:
As you can see from the above photo, the top rail extends across almost the full length of the dust cover. This does NOT prevent the removal of the dust cover, the guide rod or the bolt. Everything is fully accessible as it was previously.
As previously mentioned - the installation of these rails does not eliminate the use of the standard iron sights.

I apologize for the quality of the pic - but that shot was more difficult to get than I had imagined. It is completely possible to use the shotgun with the standard sights. The rail simply "hovers" above the sight without any restriction. Additionally, I've found that it actually provides a rather effective sun shade on the sights and prevents them from getting washed out in direct sunlight. Probably not a design consideration by UTG - but effective none-the-less.
Now, at this point in time, some of you are no doubt thinking that mounting any optics to a floating rail would jeopardize the accuracy of that optic - and you would be correct... IF we were doing this build on a rifle. Keep in mind that this is a SHOT GUN with a spread patter of several inches at only a few yards distance. No one will be going for 1 MOA with a shotgun. However if you are truly that anal about shotgun accuracy - simply move your optic closer to the front and opt to use the short rail that came in the box - (theoretical) problem solved.
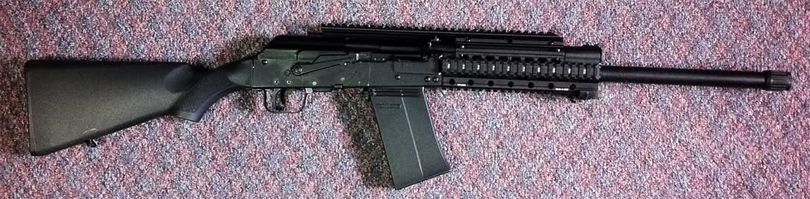
Here is a comparative shot of the Saiga-12 with and without the UAG Quad Rails:
Now that the quad rails were installed, I decided to do a bit of work to the internals of the Saiga-12:
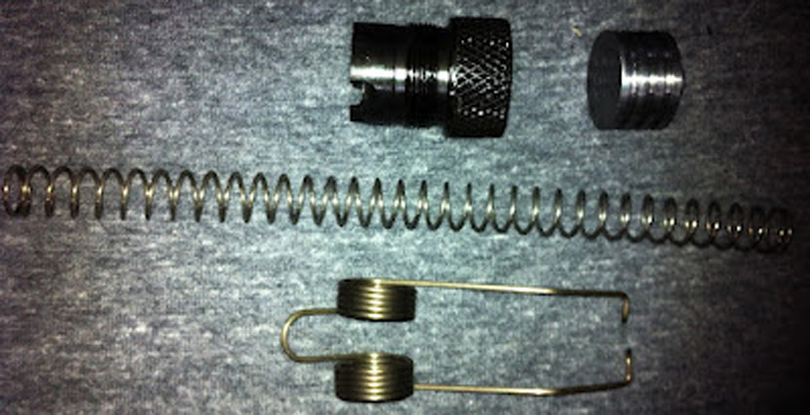
Pictured above is a DPH Arms replacement gas knob, a Carolina Shooters Supply improved trigger spring, and a redesigned gas puck to replace the piston in the gas tube. These replacement parts are designed to fix a potential issue with the Saiga-12 when shooting "low brass" rounds or light loads which don't have enough force to properly cycle the next round with the gas compression system of the Saiga. Honestly the Saiga was never designed to shoot target shot - It was designed to shoot armor piercing slugs, 00 Buck and other exotic 12 gauge ammo that the Russian military uses. So this isn't necessarily a design 'flaw' - possibly just an oversight...but a very fixable one.
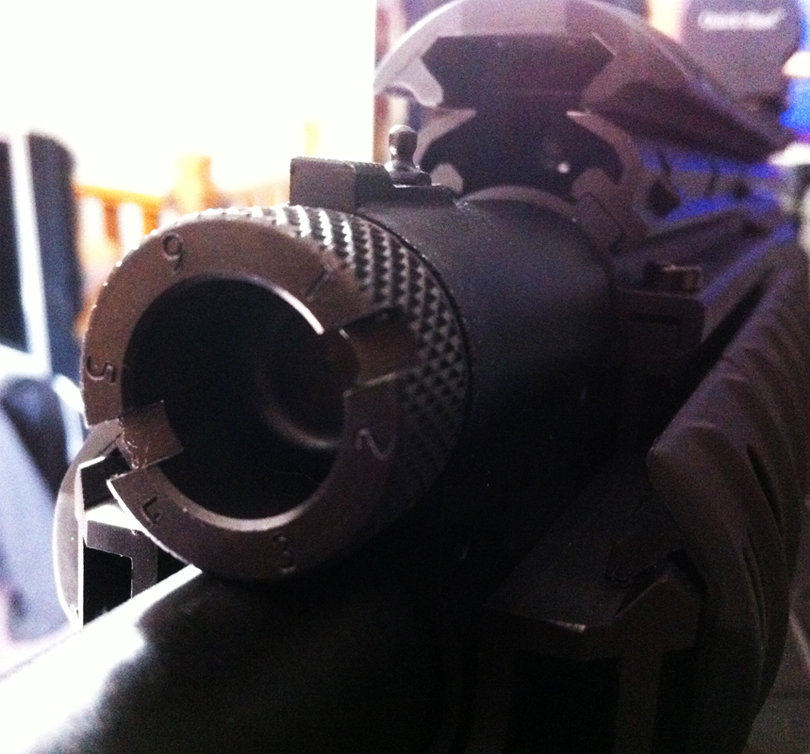
As you can see, the new DPH Arms Gas Knob is MUCH better than the factory original.
Where the original had only two settings [#1 for 3" shells and #2 for Low Brass rounds] the DPH Arms gas knob has 6.
The Instructions for setting the DPH Gas Knob (or "Gas Plug Regulator" as they call it)
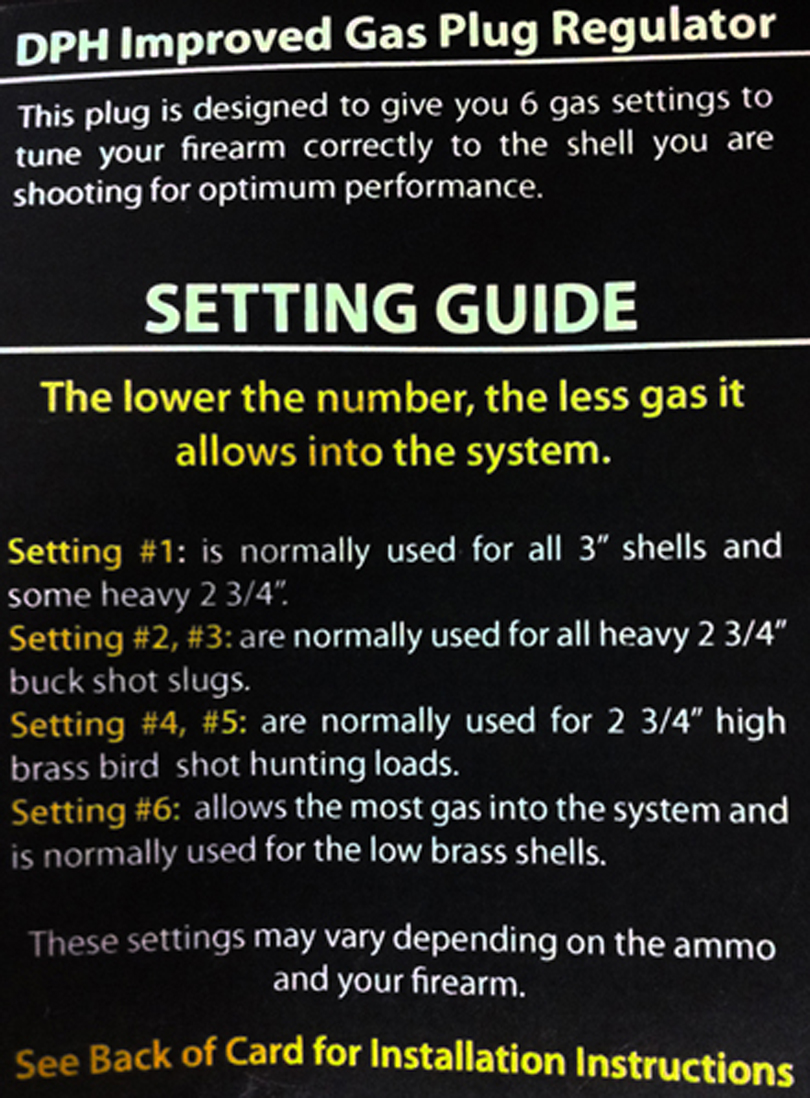
Here is where the real benefit of the DPH Arms Gas Knob comes in. 1st, there are no tools required to adjust the settings. The factory original required the pin to be held down while you turned the plug with a tool or a quarter. The new plug eliminates the need for any tools making the adjustments "field easy." Additionally, the internal design eliminates the need for the pin to be pushed down prior to adjusting the settings.
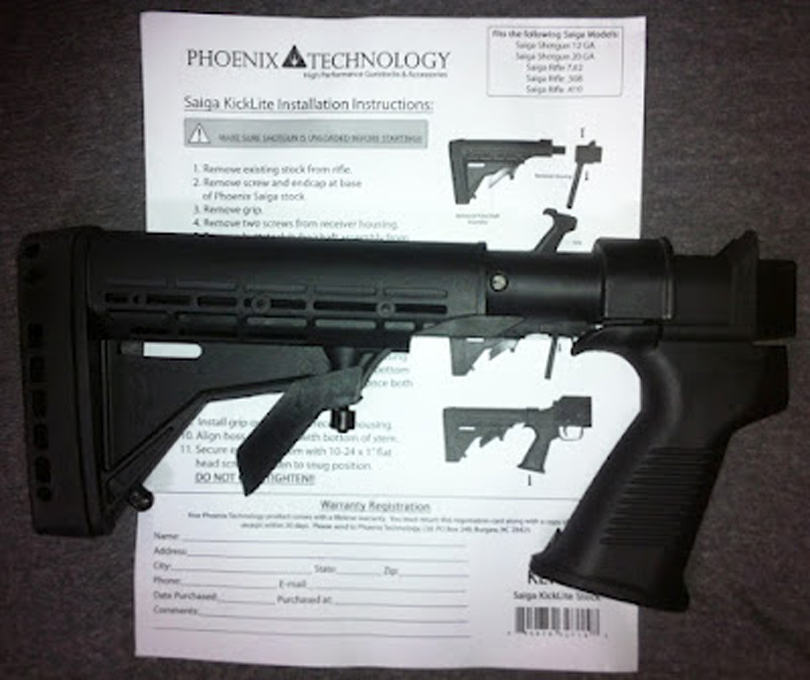
Above is shown the phoenix Technologies - KickLite- adjustable stock and pistol grip that I mentioned at the start of this post.
I honestly believe this is one of the best stocks you can put on the Saiga-12. The construction of this is fantastic. Solid. Strong, and SUPER easy to install. Not only does the stock have its own internal hydraulic recoil compensation system which reduces the felt recoil by approximately 30%, it also has a great physical pad that is extremely soft and very slip proof - grabbing your shirt/jacket and preventing the Saiga from sliding while you shoot.
Next on the list of additions and improvements is the muzzle brake.
There are literally hundreds of styles, shapes and designs for the muzzle brake. Almost all of them are advertising that they are designed as a door breaching brake. Sure - there may be a time in the use of this shotgun where things have completely gone to shit and I need to get into a place that is locked. So, why the hell not? I looked at all of them and decided to go with a style made by the folks at Red Jacket Firearms.
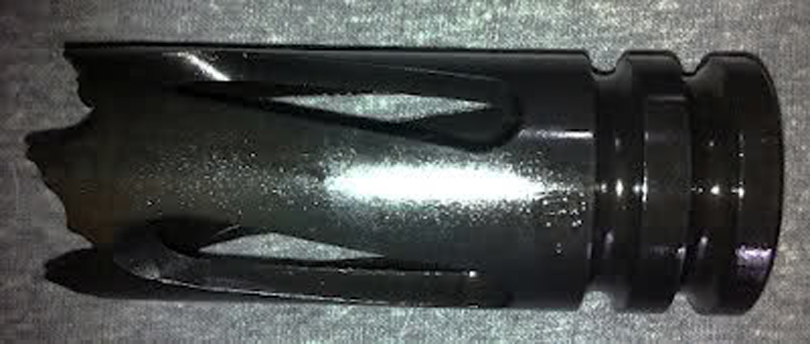
Seeing as how all the muzzle breaks were being advertised as door breachers, I decided to find out what made a door breacher work. It basically boils down to having a shit load of small spikes on the end that can be firmly pressed into a softer metal such as the brass of a dead-bolt cover to hold the barrel in place as you force 1300 feet per second hot loads onto, into and through the lock breaking it apart from the door it was attached to. The Red Jacket model wasn't the most fancy. But it did seem to be one of the most well made. Additionally they claim that the brake would help channel sound away from the shooter and anything that helps lessen the noise from a 3" Magnum round is welcome.
Now while this is a simple hand-screw-on item - I recommend that you don't.
Take your weapon to a smith and have him cut the barrel. I'm going with a 16.5 inch barrel as this brake is 2.5 inches long. The smith will slip fit and weld the brake onto the barrel bringing the length back to a legal 18 inches with .5 inch of safety room for differences in measuring. The reason I'm having it welded is because that the threads on the end of the barrel are thin and weak. Using the brake as intended will stress the threads and could damage the end of the barrel. Additionally, welding it gets rid of any 922R compliance issues.
Here is a visual comparison of the factory tip and the Red Jacket Muzzle Brake:

I also added a Mueller Reflex Sight to the Saiga:
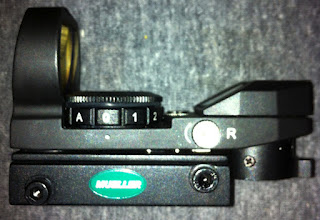
Again - this is a shot gun. So I didn't feel the need to put a $500 EOTEC sight on it. I simply wanted something that would allow me to have RAPID target acquisition with both eyes, and this has a self adjusting brightness feature that sucked me in. So far - I like it. We'll see if it holds up to the recoil of a shotgun - but being on the floating rail should help reduce the most of the shock.
Now that the Saiga was finally approaching what I consider to be a tactical combat shotgun - I needed more capacity in rounds. So, I went for the MD Arms MD-20, 20 Round Drum (You can find them much less expensive if you take the time to look.)
The theory behind recoil buffers isn't necessarily for the benefit of the shooter, but more for the benefit of the weapon. The recoil buffer prevents the the bolt, bolt carrier, op rod, or slide from directly contacting the receiver. No recoil buffer that I am aware of will require any modification to the firearm. HOWEVER you may actually not need one. - I'll explain after describing the installation of the buffer:
A simple test can be done with masking tape. Take some masking tape and fold it onto its self so that it's sticky all the way around. Place the masking tape where the buffer is shown, re-assemble your Saiga and fire it - twice. Inspect it. If the tape has been disturbed - then you need a buffer pad...if it's exactly as it was - you aren't impacting the parts. But its still safer to have it in if you ever over gas the weapon.
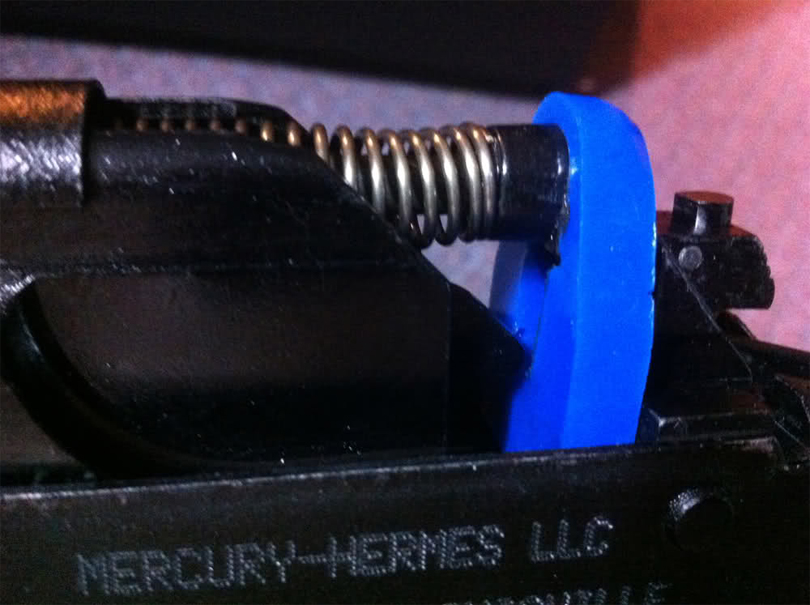
Here you can see the recoil pad in place. On the Saiga 12 it is designed to prevent the carrier group from impacting the rear of the receiver and the guide-rod rails.
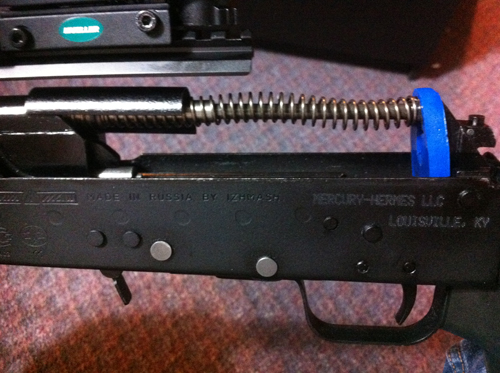
The installation is simple. Just remove the guide rod and spring - separate the two - slide the pad across the spring and to the furthest point back. Re-couple the rod and spring - and re-install the system.

Here you can see what the bolt looks like in the rear locked position. Without the buffer pad in place, on a violent discharge - ESPECIALLY WHEN YOU HAVE OVER GASSED YOUR SAIGA - the carrier group can impact the rear causing metal fatigue and potential weapon failure. (Over gassing is operating the Saiga with an improper Gas Regulator setting for the type of round used. For Example: Using 3" High Velocity Magnum Rounds and having the gas regulator set on 6 - as 6 allows the MOST amount of gas to leave the barrel, pressurize the gas tube and initiate the autoloading cycle.) When using the DPH Arms gas regulator, please refer to the photo provided for a correct setting for your rounds.
The use of the recoil pad may create a need for you to increase the amount of gas entering the tube by setting the regulator to one digit higher than normal. If this is the case - your weapon never needed the recoil pad for normal operation, but it is safe as it prevents damage during those absent minded times when you over gas the tube.
Here is a stage by stage comparison of the evolution of this Saiga-12:
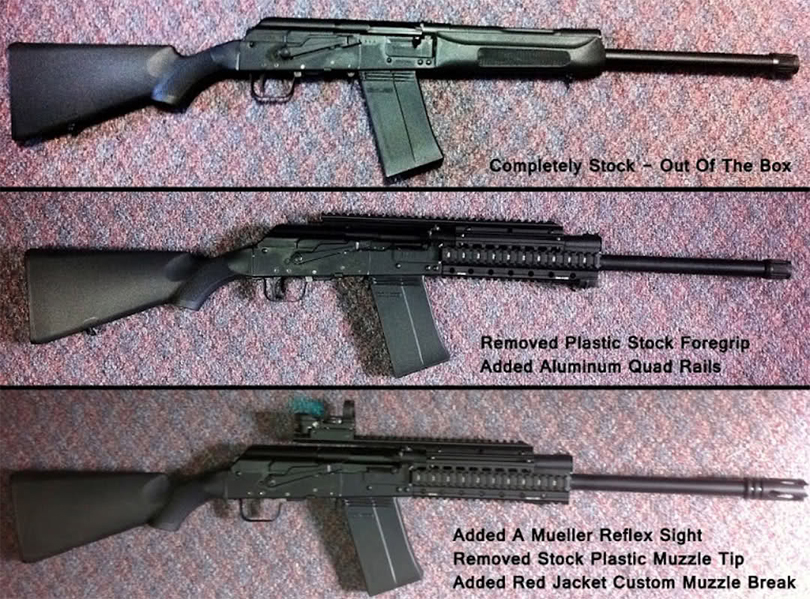
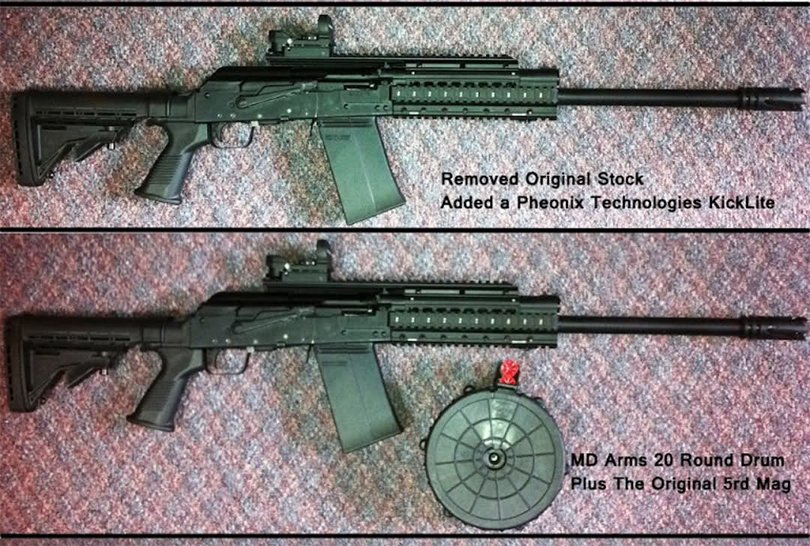
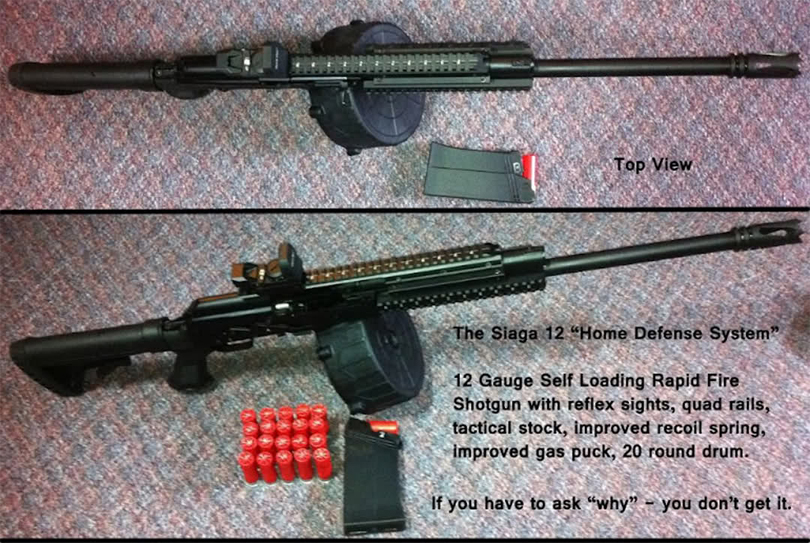
So, that is where it sits as of today. From bone stock to an amazing home - sorry, combat type shotgun.
The next batch of additions will be tactical lights, vertical foregrips, a single point conversion sling, a cheek pad for the stock, and -of course- a custom paint job.
I'll also be having the internals "de-burred", the bolt polished and the feed ramps smoothed.
Stay tuned.
EDIT: Also, before anyone says otherwise, that Mueler reflex site has now witstood it's 2,000th round through this Saiga and it is still functioning perfectly.
